Watch: How to create a volunteering opportunity
Use this flow to ask volunteers for hands-on help or a professional skill. It has four steps – Type, About, Logistics and Review. You can save your progress and come back to it at any point, so there’s no need to finish it in one go.
Top tip: Before you start, it’s worth updating your profile – several fields there will prefill this form automatically.
Where to find it
From your ActionFunder homepage, look for the My volunteering panel, or select Volunteering in the side navigation to get to your volunteering home page. From there, select Create volunteering opportunity to start the flow below.
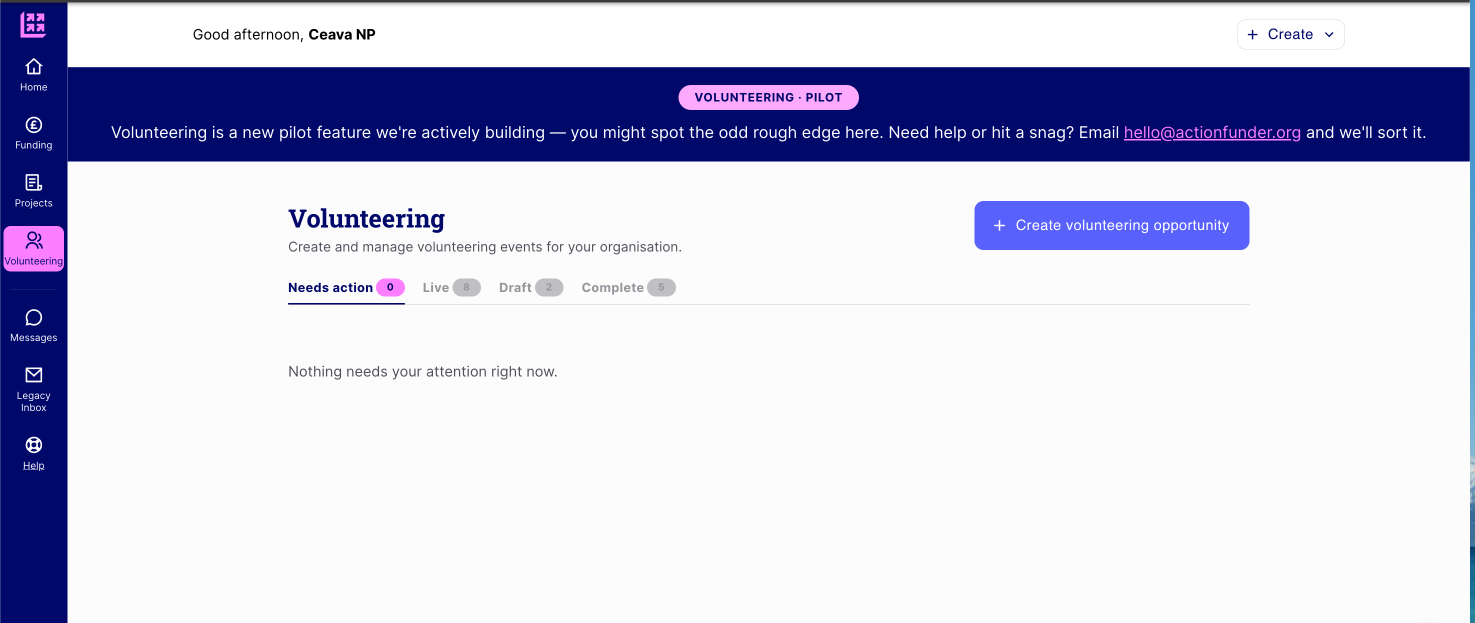
Volunteering is a pilot feature that’s still being built, so you may spot the odd rough edge — if you hit a snag, email hello@actionfunder.org.
Step 1: Type
Choose what kind of help you need. This sets how volunteers see your dates and how they sign up, so it’s worth getting it right before you go further.
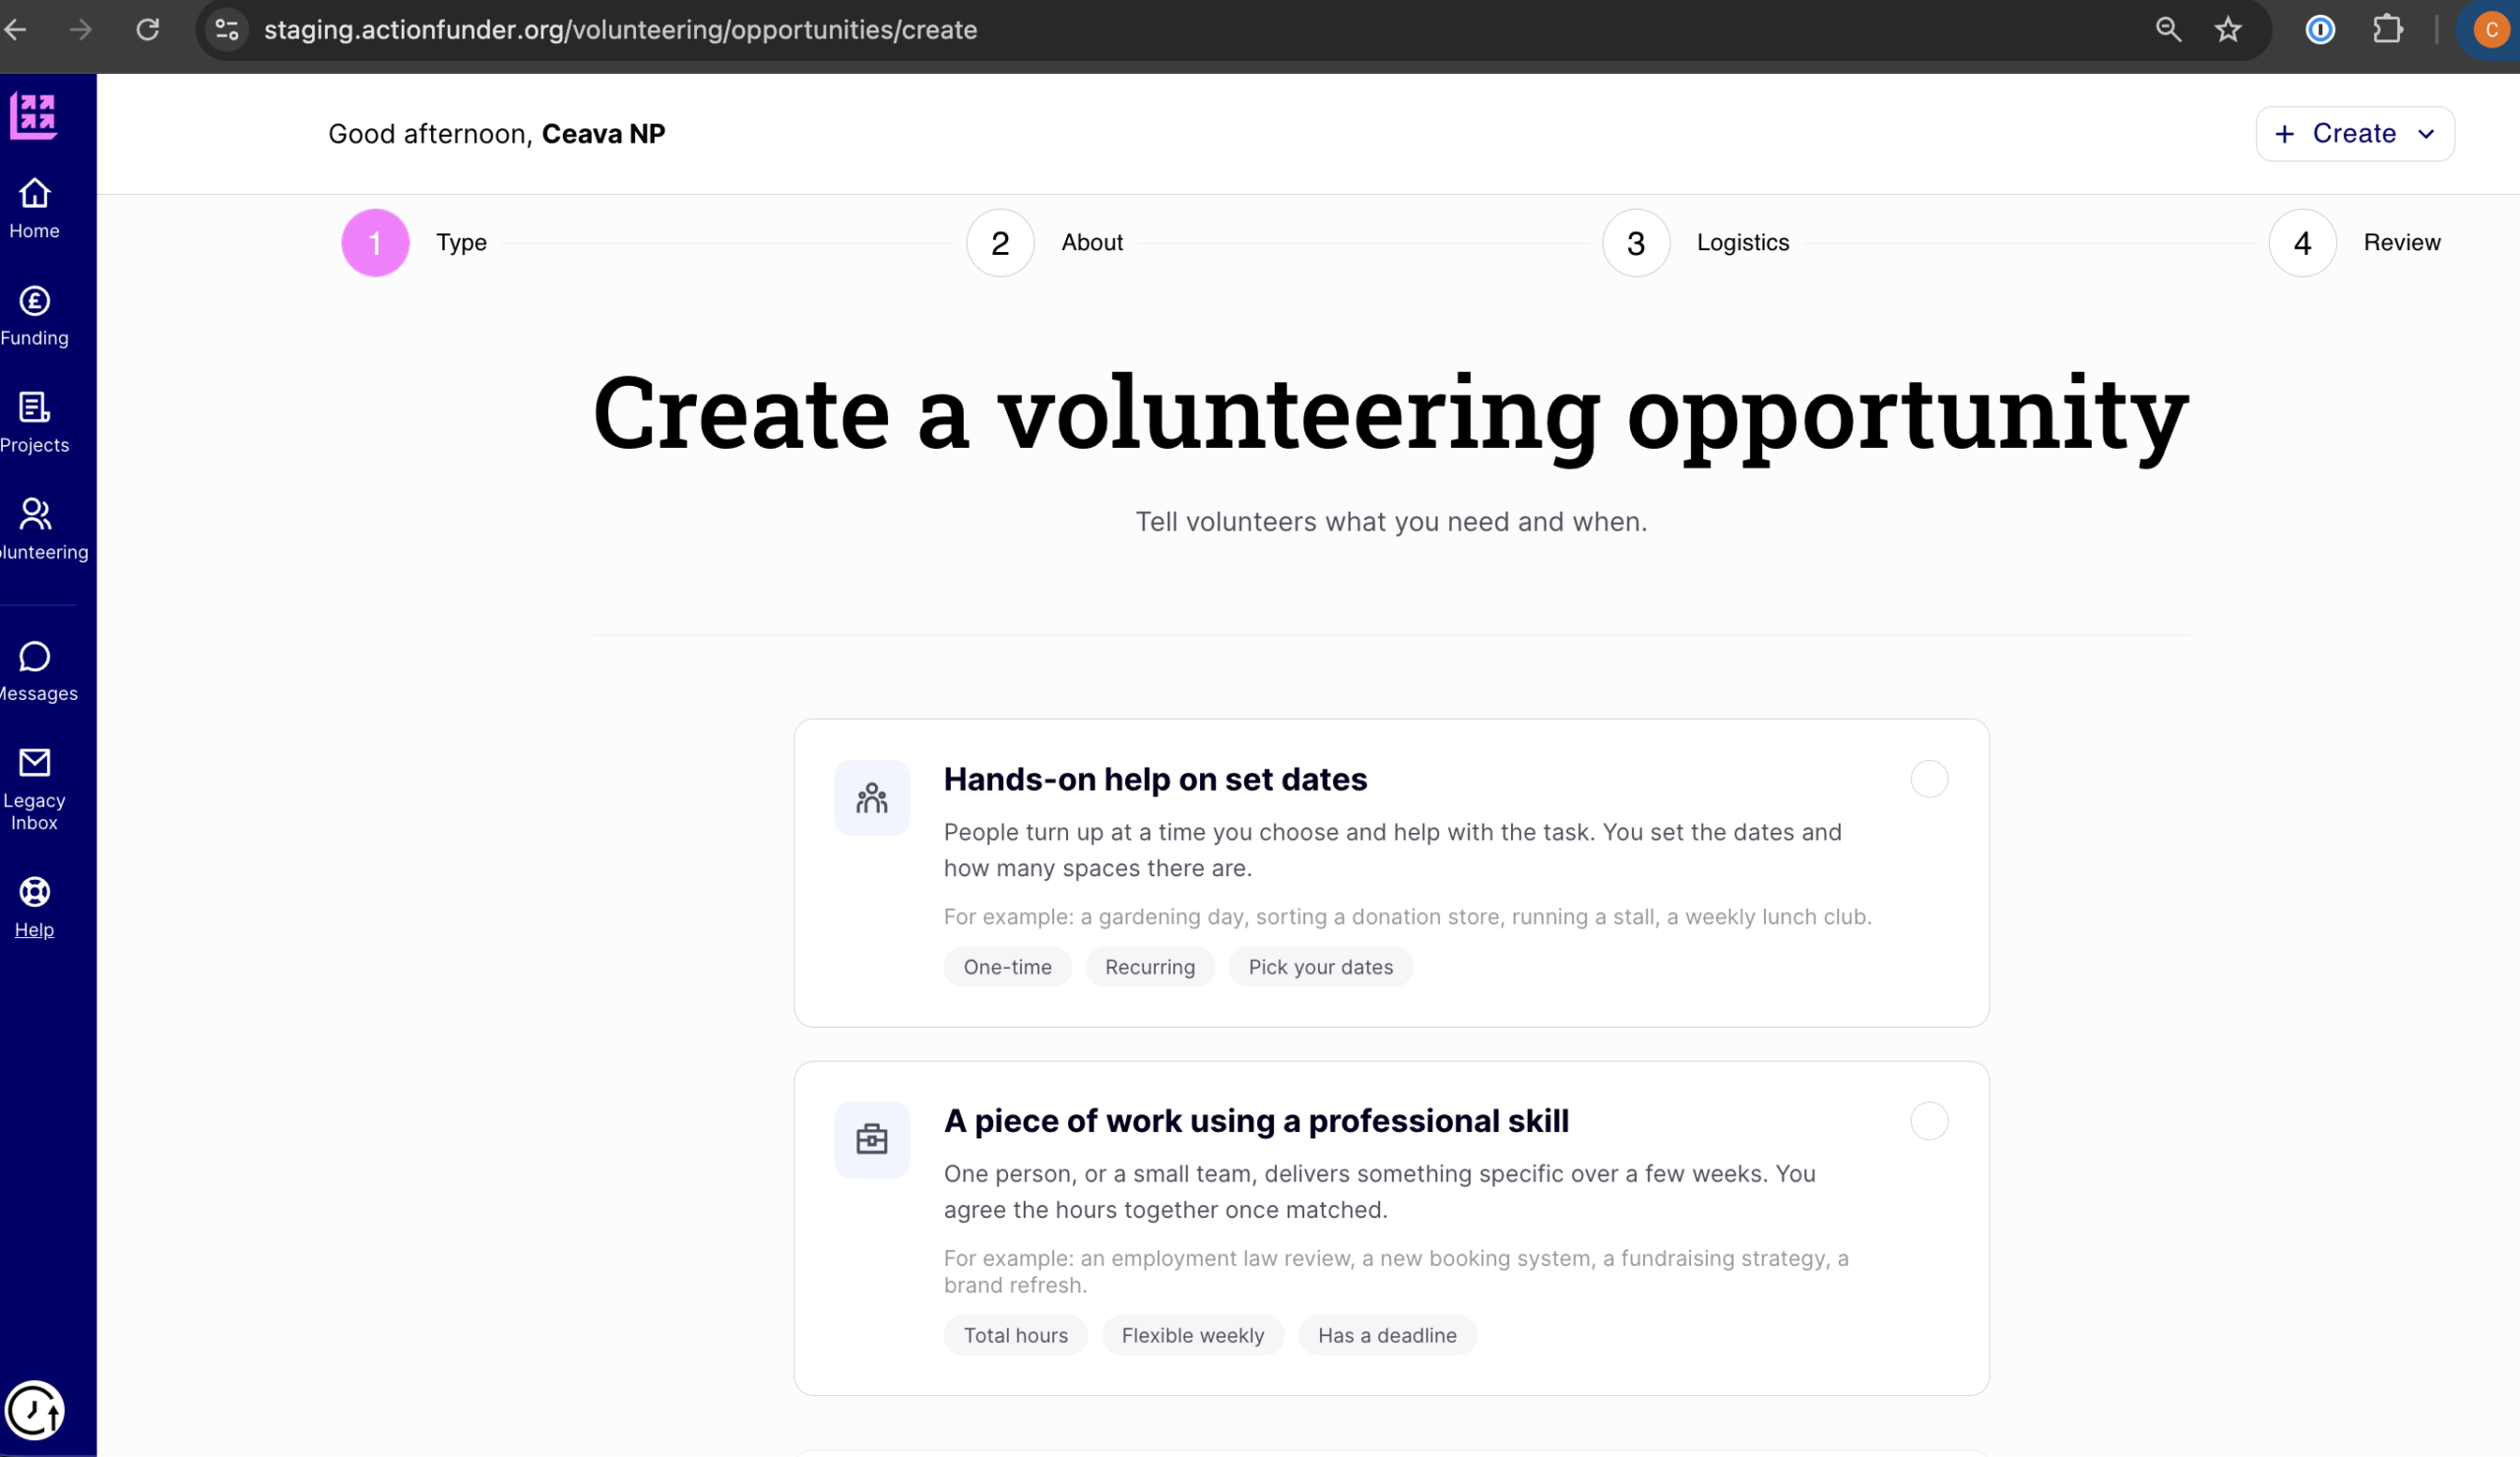
Hands-on help on set dates
One-off or repeating. People turn up at a time you choose and help with the task. You set the dates and how many spaces there are. For example: a gardening day, sorting a donation store, running a stall, a weekly lunch club.
A piece of work using a professional skill
Delivered over a few weeks by one person, or a small team. You agree the hours together once matched. For example: an employment law review, a new booking system, a fundraising strategy, a brand refresh.
Not sure which one? If it matters when people turn up, choose the first. If it matters what gets delivered, choose the second. You can try both options out before publishing
Step 2: About
This is where you describe the work itself.
- Opportunity name – A clear name a volunteer will recognise (up to 100 characters).
- What’s the problem or need? – Describe the motivation behind the opportunity. Tip: include statistics and facts to back it up.
- What skills does it need? – Pick a category (there are 14, listed alphabetically after hands-on help), then choose the specific skills beneath it. The list is fixed, so volunteers see the same words you do. If a skill is missing, tell us – we read every submission to decide what to add, rather than adding it to your opportunity straight away.
- Level of experience and how many volunteers – For skilled work, only one volunteer takes the opportunity on; everyone else who signs up is waitlisted.
- Anything more about the skills you need? (optional) – tools, level of experience, or anything the tags above don’t capture.
- What will the volunteer hand over? – what you’ll both have at the end. This is what you’ll judge the work against.
- What would this unlock for you? – funders need to see that the time is worth more than its cost, so put a number on it if you can. A strong example: “15 hours of development saves us £4,000 in agency fees and lets us reach 300 more families a year.” A weaker example: “We need help with our website.”
- Focus areas – which causes this opportunity supports.
- Cover image – helps volunteers picture the work (PNG or JPG, up to 10MB). Cover images are required – you won’t be able to publish your opportunity without one.
- Beneficiaries – estimate how many people will directly benefit.
- Who will benefit from this opportunity? – pre-filled from your non-profit profile; change it here if this particular opportunity supports a different group.
- Expected impact — describe who will be affected and what will change, with measurable targets wherever possible. There’s an impact guide linked on this step if you’d like a hand with it.
Step 3: Logistics
- Where does it happen? – the options here are Remote or In person.
- Before you confirm someone – skilled volunteers often need access to systems or sensitive information, or a discussion to plan the work together. If you would like to speak with interested volunteers select the option to ask for a short introduction call before approving the registration. You can reach out to them through messaging to set up a call or ask questions.
- How should the time be shaped? – choose the rhythm that suits the work: a steady number of hours per week over a set number of weeks, one flexible total to use however suits before a deadline, or leave it not decided yet and let the volunteer propose the hours and rhythm. The more detail you have the easier it is for volunteers to know what to expect
- When must it be finished? (optional) – a funder may offer their time months before delivery, so give the date the work has to be done by. If there’s a reason for the deadline — a grant report, a service launch, an inspection — say so. Volunteers commit more readily when a deadline has a reason.
- After sign-up (optional) – anything you’d like sent to a volunteer once they’re confirmed. This won’t appear on the public page.
Step 4: Review & Publish
This shows you exactly how volunteers will see the opportunity, including your commitment, timeline and organisation details, before it goes live.
If you’ve changed who the opportunity reaches partway through editing, you’ll see a summary of what’s changed – for example, which companies’ employees can and can’t find it now, and confirmation that anyone already signed up keeps their place and their hours still count.
Before you publish, note what you’re agreeing to: completing the impact surveys, and posting at least two updates on the work – one at the midpoint and one when it’s complete.
When you’re ready, select Publish opportunity. Or select Save as draft to come back to it later. Nothing is visible to volunteers until you publish. so make sure you do when you’re ready
Publishing doesn’t commit you to hosting anyone: it just makes the opportunity visible so volunteers can apply. You always get to approve or reject each signup before anyone is confirmed – see Managing volunteer signups and messages.
Managing your opportunities
Back on your volunteering home, everything is organised into four tabs:
- Needs action – opportunities with sign-ups or other actions waiting on you. See Managing volunteer signups and messages for how to work through these.
- Live – published opportunities that volunteers can currently sign up to.
- Draft – opportunities you’re still working on. Nothing here is visible to volunteers until you publish.
- Complete – opportunities you’ve marked as complete, or whose dates have passed.
See also: Update your profile with key information · Managing volunteer signups and messages